Wednesday, February 29, 2012

Carpeting is Hard Work!

Once we’d finished all of the drywall, painting, and trim it was time to put the carpet down.  Eventually, we want to put carpet in our bedroom and the family room too, so we’ll probably end up replacing the carpet in the two smaller bedrooms anyway.  Still, we needed carpet for the time being…we just didn’t want to spend a bunch.  Our solution?  We drove to a carpet store and asked if they had any remnants.  This is a great way to get a good deal on carpet…especially if you only need a little!  We ended up choosing two different remnants, one for each room.

Andy rented a knee kicker and carpet stretcher from one of the local hardware supply stores, and we got cracking.  What we didn’t realize was how much hard work it was!

The easy part, however, was putting down the padding and tack strips.  Unfortunately, I failed to get pictures.  Lame, I know!

Then you have to cut and lay the carpet.  This lovely little knee kicker thing helps you get it down right.

DSCF2001 (2)

Only problem is you actually have to kick it with your knee.  Yes, Andy most definitely had sore knees later!

Then you use this crazy stretcher to stretch the carpet and get everything flat.

DSCF2003 (2)

Overall, we learned that laying carpet is really hard work…but it’s worth the effort.

DSCF2005 (2)


DSCF2006

Doesn’t new carpet just make everything look so much better?

Thursday, February 16, 2012

Never Paint a Ceiling Blue

Once we had all the walls in the new, bigger bedroom framed, it was much easier to picture how it would turn out.  Instead of an icky, gross bedroom we just might have a nice, cozy one!

As soon as we had all the walls framed, the exterior walls insulated, and all of the electrical boxes placed and wired, we began working on putting up new drywall. 

DSCF2063
At the corner by the CH&A unit, we used a lip seam, making a nice, rounded corner.  It gave the room a nice, modern look to it!
DSCF2064
Andy also finished covering up the old “peak-through” to the living room. 
DSCF2067
It was a little difficult to get the new drywall and sheetrock to match the old, but Andy used our drywall sprayer over all of the sheetrock.  By covering even the old drywall, we were able to blend it much better.
DSCF2068
I spent hours and hours painting this room and the ceiling over and over.  The ceiling is fairly low, and it took at least three or four coats to cover up the old blue paint.  People, for the sake of any people who will own your house after you…do not paint your ceiling blue.  It’s absolutely ridiculous to cover up!  (Sorry, no pics…this was a project all on my lonesome.)
In early November, my sister Victoria came to visit and she helped us paint the room.  We choose to leave most of the walls plain antique white, and paint two of the walls a bright green for an accent.
DSCF2112
DSCF2118
The room is south facing, so the green color is very cheery and colorful.  By the way, these pictures don’t really do the color justice.  Stay tuned for some later pictures of how great it looks!
DSCF2120
We also replaced the old closet door with a new paneled one (one of several we bought at an auction last summer).
DSCF2121
We also painted the door to the small closet containing the CH&A unit and electrical box white as well.  We plan to build shelves around it to make it a bit less awkward.
DSCF2014
We then added new white trim.  I also salvaged and refinished some of the old trim and we used it too.  (More abut that later.
DSCF2011

Everything was really starting to come together!

Next up, “Carpeting is Hard Work”.

Tuesday, February 14, 2012

Would You Like One Bedroom or Two?

Pretty much as soon as we had finished our overwhelming-project-of-a-kitchen, we started work on a new project.  If you remember from the pictures, the back of the house held two teeny, tiny bedrooms.  And I mean tiny.  To make matters worse, one of them had a sliding glass door onto the back porch, making it a terrible place for a bedroom.  And the other one?  I have no idea what happened to the carpet in there, but I really don’t want to know.

Here’s the first room:
DSCF2158 (2)
And here’s the other:
DSCF2159 (2)
These rooms were literally 9’x9’, if that, and very awkwardly arranged.  You really couldn’t fit a queen size bed in either.  So, we decided to fix that.  Instead of a four bedroom house with two tiny box bedrooms, we decided to make it a three bedroom house with good sized rooms and an extra office. 
We started by taking out the sliding glass door.  All thanks go to Andy for doing that…
DSCF2001 (3)
We actually found that there were three layers of siding on the house.  So, before the house was white, it was plain stained wood:
DSCF2006 (3)
We then framed in a new door.
DSCF2028 (2)
We borrowed the door of this little outbuilding we have:
DSCF2009 (3)
Here’s Andy fitting the door in place:
DSCF2033 (2)
Once that was done, we pulled up the existing flooring in room.  Our plan was to move the wall over a few feet, making this room the office.
DSCF2038 (2)
What was I doing during all of this, you ask?  Painting, of course.  That room that the old owners so graciously painted dark blue (including the ceiling) wasn’t exactly working for us.  So, I set to the tedious task removing all the molding and then primering the walls and ceiling white.  Oh, and ripping up that nasty carpet.  Yes, gloves were used.  
DSCF2039 (2) 
Meanwhile, Andy worked on framing the new wall in the other room.
DSCF2042 (2)
Next order of business?  Ripping out the old wall.  Yes, Andy had a lot of fun with that. 
DSCF2014 (4)
Once he’d knocked out all the drywall, he started taking apart the framing.  If you plan on doing this at home, make sure you know what you’re doing.  This wasn’t a supporting wall, so it was fine to take out.
DSCF2016 (4)
Andy used ply wood on the outside of the house where we had extended the wall.
DSCF2020 (4)
Next came the more challenging part.  Our house had a lot of wasted space and weird architectural features.  We planned to fix that.  If you remember correctly, these two bedrooms came off of this very long hallway:
DSCF2171 (2)
The bedroom at the end on the right (the one with the blue ceiling) was the one we were expanding.  So we decided to make the hallway shorter and the room larger by putting the door in the hallway instead.  We would gain a little niche when you first walked in.
So, once we had moved the wall, we started to take out the “useless” wall.
DSCF2022 (3)  
Before Andy took out the framing, though, he had to determine if this wall was load-bearing.  Meaning, we could have a big problem on our hands if we tore it out.  To do so, he had to crawl into the weird attic.  Poor guy!

Thankfully, it wasn’t, so we tore it out  There was a little extra wall where the central heating and air vent was, so we took that out too:
DSCF2039 (3)
Andy then framed in the new doorway.
DSCF2043 (3)
So here’s all the extra space we gained.  On the floor you can see where the old walls were.
DSCF2046 (3)
Do you think it was worth it?  What would you have done?


Next up, “Never Paint a Ceiling Blue”.

The Return of “Rocking”

Okay, so I know it’s been a LONG time.  What can I say?  We’ve been busy!  We scrambled like mad to finish all of the escrow work before the end of November.  And then, once we were done, we took a little break.  In addition to the busy Christmas season suddenly upon us, two little pink lines rocked our own world forever.

But, we’re back at this whole “rocking” this house thing, and I decided it was time to update you on all we’ve done. High time.  Over the course of the next few weeks, I hope to update you on what we’ve been up to on our house since October.  I’m glad you’ve stuck around!

Friday, October 14, 2011

The Long Awaited Kitchen

Yes, I know, I’ve been slacking.  And everyone has been asking to see the completed kitchen.  But where to begin?

When I left you last we were working on laying tile and putting in lights.

Next we began working on the concrete countertop.  This wasn’t something either of us knew how to do, but, as always, my sweet man learned.  we started by laying plywood on the countertops.

DSCF2073

Andy cut a hole for the sink…

DSCF2076 

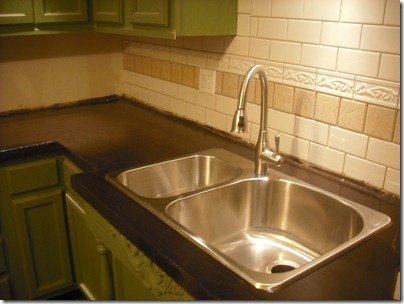
We tested the sink and faucet to see if it would fit.  It did!  By the way, this sink we got for less than $100 online (Ebay I believe).  I absolutely love it.  It’s not the apron-front or undermount I wanted, but it’s brand new and the design is awesome.  The right side is extra big and the left side is smaller, which I actually like.  It’s so nice to be able to fit my big cookie sheet in the sink without turning it diagonally.  Even my 9x13 casserole fits in the bottom (it didn’t at the old house). 

DSCF2077

Anyways, then Andy cut strips of plywood to put on the front side under the actual plywood (so the countertops wrap around the cabinets, in essence).

DSCF2080

Then he cut strips for the sides.  What we were doing was making a frame to pour the concrete in.

DSCF2081

Have I mentioned my man’s a genius?  He used our old flower bed edging to make the frame around the curved sink!

DSCF2082

TA-DA!

DSCF2088

Finally, we nailed skinny little strips to the back against the wall, to help guide our concrete pouring efforts.

DSCF2090

So then we worked on mixing the concrete.  Andy’s old concrete mixer tanked (some squirrel made a nest in it!)  So we had to mix it in our wheelbarrow by hand. 

DSCF2095

Andy used some old wire fencing in the middle of the concrete to reinforce it.

DSCF2100

Finally, we got it done and started pouring the concrete.

DSCF2092

It was kind of hard to get it smooth, but we tried our best!

DSCF2105

And here was what the one countertop looked like.

DSCF2012

We sanded it, painted it black and then sealed it with polyurethane.

DSCF2013

And here it is with the sink!  We bought the faucet at Lowe’s.
DSCF2007 (3)

Andy had to do a lot of plumbing work, since there was no dishwasher before and all the old plumbing was bad.

Next we did the second part of the counter, which was much easier.  I think we got the hang of it!

DSCF2002 (4)

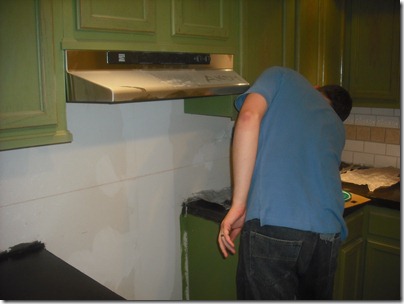
Next we put in the range hood!

DSCF2014 (4)

Then we worked on laying the rest of the tile.

DSCF2016 (4)

Done!

DSCF2018 (4) 

Well, almost!  We had to cut the tiniest little strips of tiles ever to fit between the countertops and tile.

DSCF2021 (3)

As a side note, we had a little work buddy who likes to watch us through the window!

DSCF2010 (2)

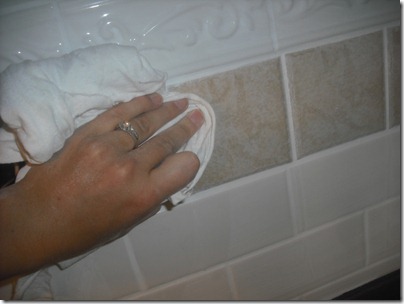
Next came the grouting!

DSCF2037 (3) 

Proof that Andy’s not the only one working!  Emily asked if I liked green.  I do, but my work shirt just happens to be a shirt I’ll never need again. hehe!

DSCF2041 (3)

Once the grout dries, it wipes off of the tiles really easily.
DSCF2045 (3)

Doesn’t it look awesome?

DSCF2047 (3)

Finally, Taylor and Lane came over to help us move our fridge into the kitchen.  And guess what?  It didn’t fit!  The old wall was so bowed that the fridge didn’t quite squeeze in.  So, we just left it in the corner.  At least it was in the kitchen!

DSCF2024 (3)

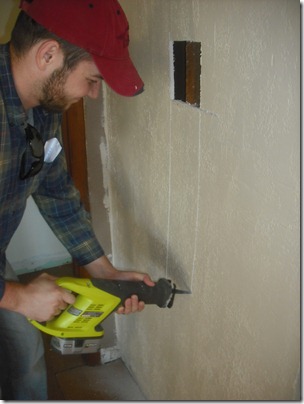
Thankfully it wasn’t for too long!  Andy cut into the wall from the other side.
DSCF2075  

Look how curved the wall was!

DSCF2074

So, to fix it, we cut into the bowed stud part of the way…

DSCF2078

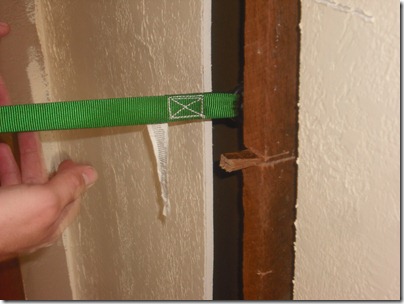
…and, ahem, pulled the stud back.

DSCF2076

And then pushed in a wedge to hold it in place.
DSCF2079

Then we added a brace on the wide to screw it in and make it secure.

DSCF2080

And, guess what?  We fixed it!  Look at how level it is now!

DSCF2077

And you know what?  The fridge fit!  We were able to move in the fridge, oven, table, chairs, and all of our other kitchen stuff. 

And so…


…without further ado…


…I present to you…


…Are you ready?…


…Oh, but wait!…


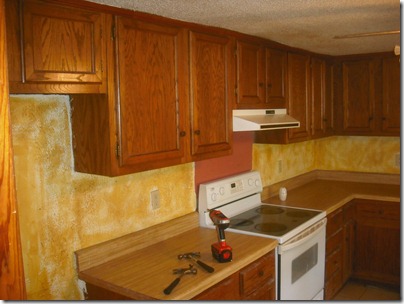
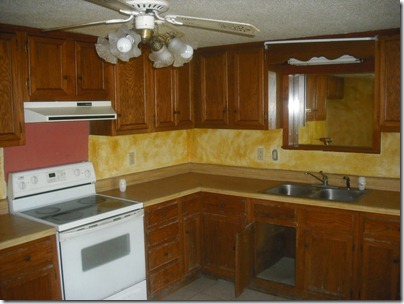
….First, let’s take a trip down memory lane and see the before

June 2011 065

June 2011 064

June 2011 074

June 2011 075

June 2011 076

June 2011 078

And now…


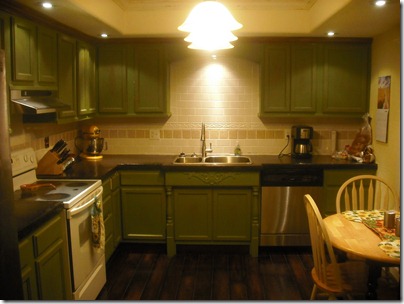
Our BRAND SPANKIN NEW KITCHEN!!!
DSCF2001 (2)

DSCF2002 (2)

DSCF2003 (2)

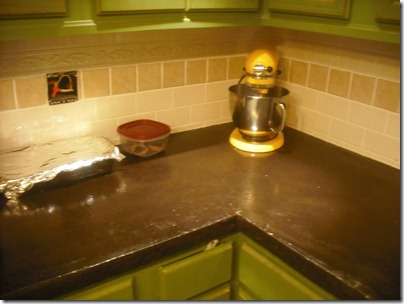
Lots of counter space! Yes, we still have one outlet to put in.
DSCF2005 (2)

DSCF2007 (2)

DSCF2009 (2)

DSCF2010 (2)  

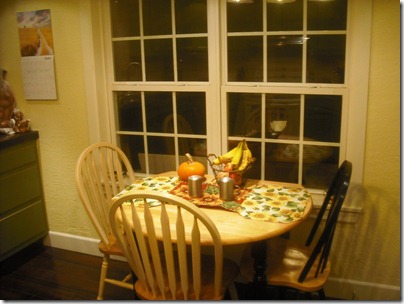
Our kitchen table looks great in here!  And I love the great big window.  It more than makes up for not having a window above the sink!
DSCF2011 (2)

We were going to put the table in this corner, but we liked sitting by the window too much.  So, I think a nice baker’s rack is in our future!

DSCF2014 (2)

I love having an oven back!  We’re going to get a stainless one to match eventually, but this white one works great for now!

DSCF2018 (2)

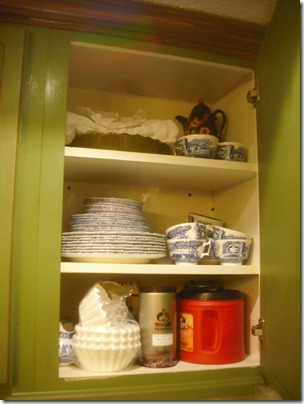
Oh, and did I mention that I love all the cabinet space I have?

DSCF2019 (2)

And more…

DSCF2020 (2)

Andy’s going to take some pictures with the better camera so you can see it better, but until then, I hope these suffice.  I can’t believe that this is the same kitchen…and especially the same cabinets!

Can anybody guess what the final cost was?